It has never been more important to understand how visitors arrive at your website and how they behave when they get there. That's why we always applaud our website design clients who actually come to us with Google Analytics already set up on their old websites. This allows us to not only show traffic and conversion data for the newly optimized sites we develop, but with previous site GA stats, we can compare to historical data to show progress. Additionally, knowing that clients already see the wisdom in having Analytics installed tells us they understand the value of making data-influenced decisions about their website and online marketing efforts.
Sadly, even these clients (who are an extreme exception, by the way) are rarely aware of some of the more advanced settings that can help ensure data is as pure as possible. One of these advanced settings isn't advanced at all, but can go a long way in helping to provide a more accurate and comprehensive understand of real website visitors. The simple process of filtering out traffic from their own IP address prevents internal traffic from skewing metrics in any unnatural.
But enough with the why, let's get to the how...
Click on "Admin" in the newly designed
Google Analytics navigation menu:

Assuming you have full administrative access over the account (not just the "property" or "view"), you'll be taken to a screen that looks like this:
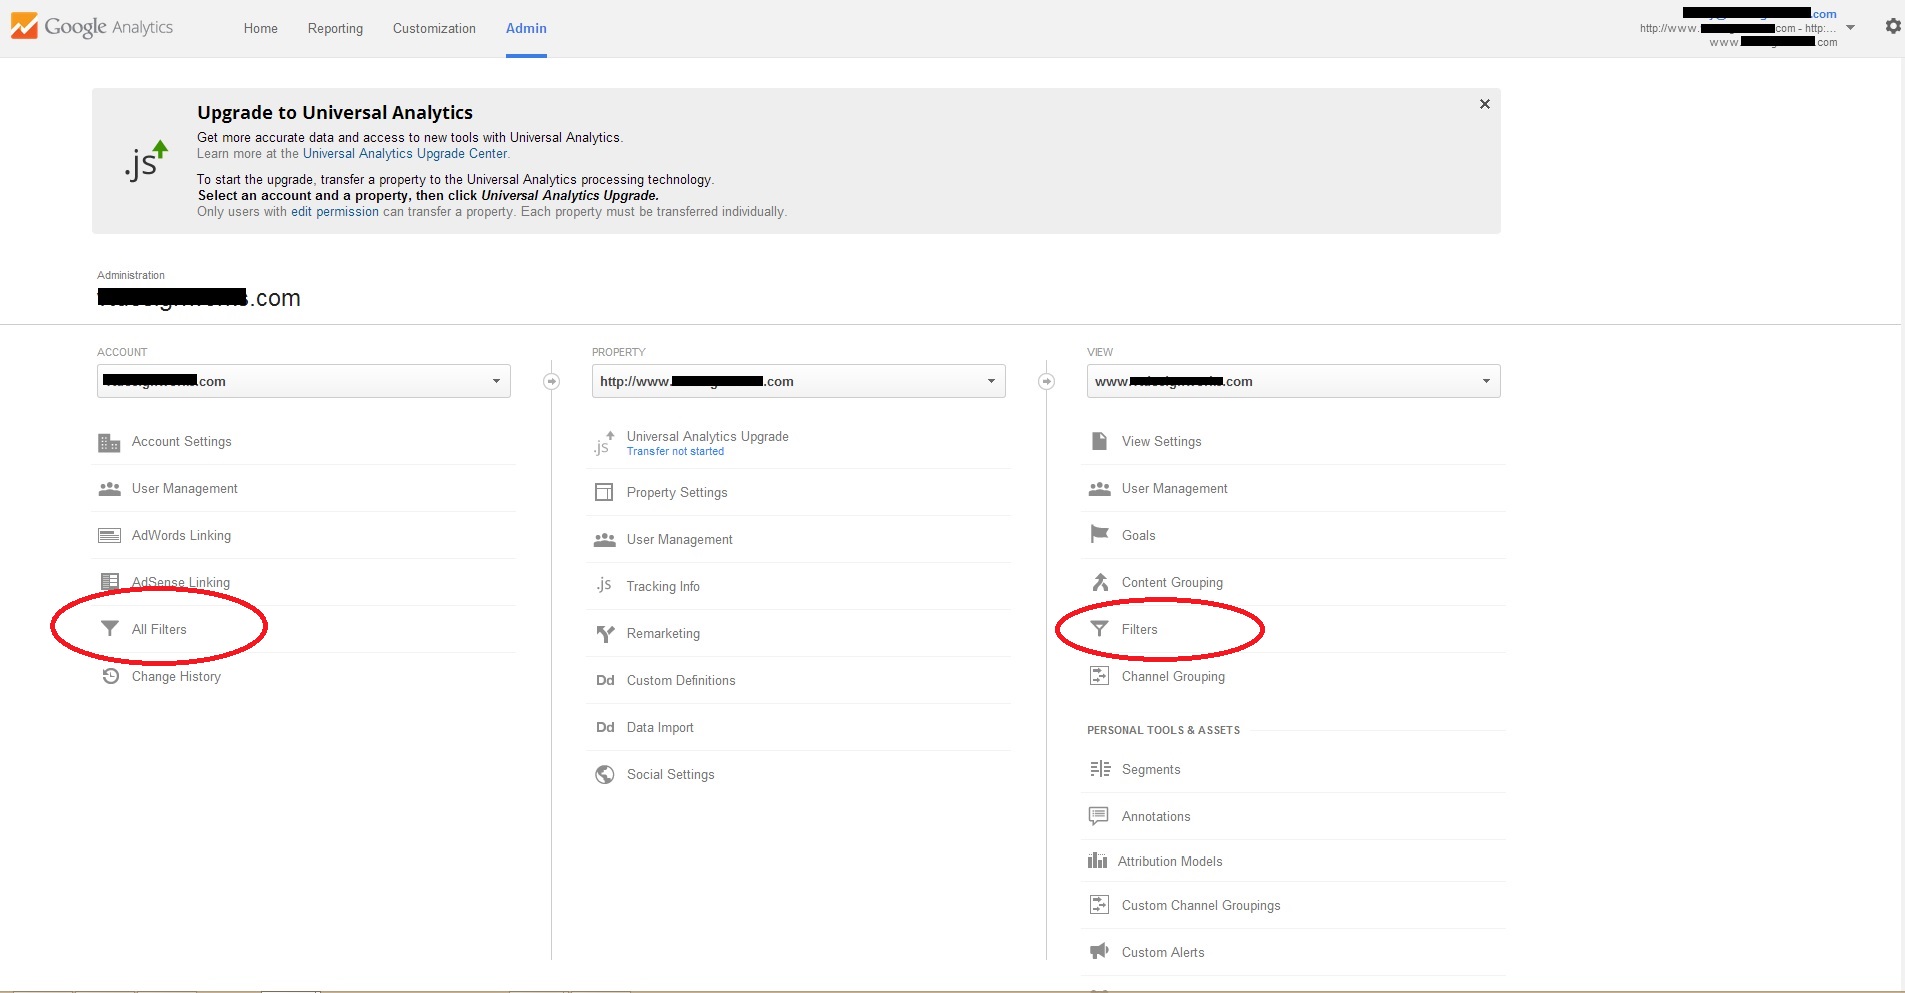
Here you can click on "All Filters" to add/edit filters for any of the sites listed within that account, but even if you only have admin access over the individual site you can still add/edit "Filters" (as you can see in the circled sections above).
Create a New Filter in Google Analytics
In either case, you're taken to a screen that lists all existing filters (which you can click to edit - if you already had any) and allows you to create new filters, by clicking this button:
 Assuming you don't have any filters set up yet, based on the fact that you're reading this post, you want to click the "+ New Filter" button to get started, which will take you to this screen:
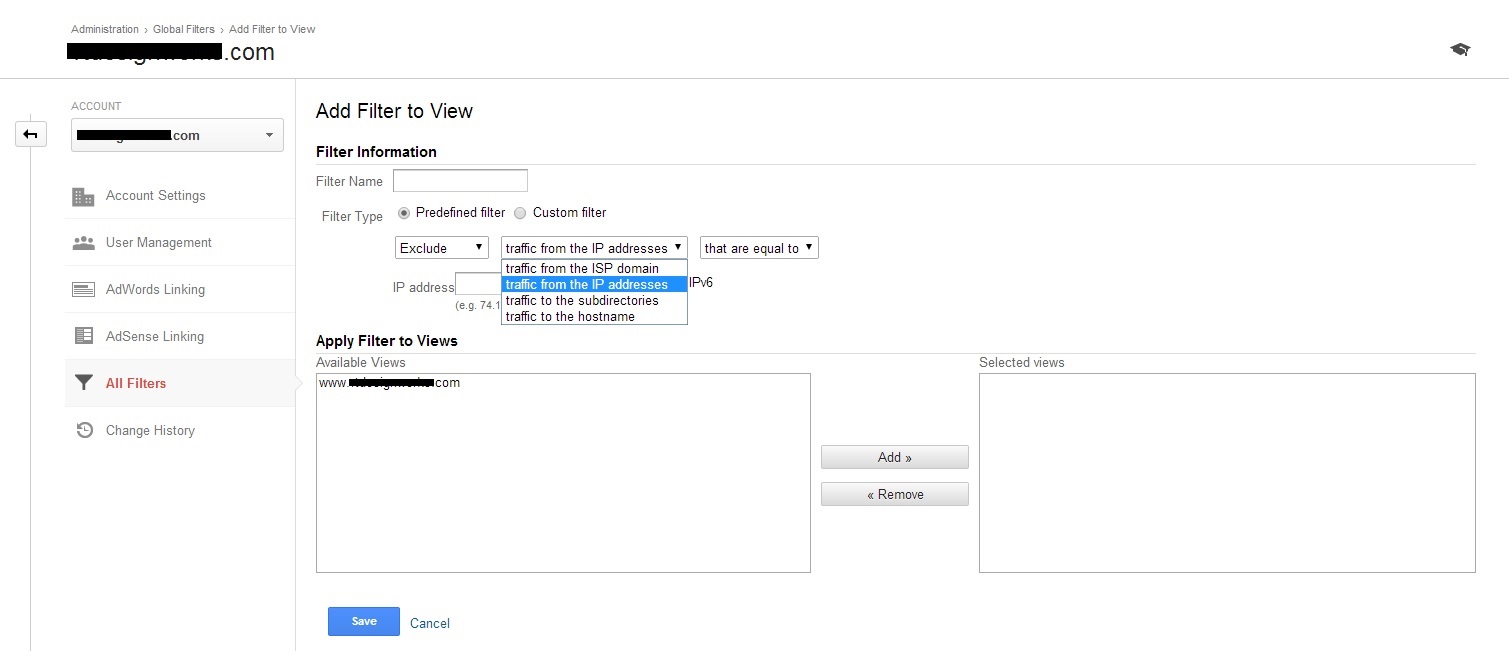
You want to name your filter something obvious like "Company Office IP" because you want to be able to easily distinguish it from others you may add in the future. You'll then leave the default "Exclude" setting, but change the second dropdown to "traffic from the IP address", and then leave the default "that are equal to". Selecting the "IP" option triggers the fields for you to enter your IP address.
What Is My IP Address?
If you don't spend your life on the internet like we do, this is a reasonable question, as is the more important/accurately phrased follow-up question: How do I figure out what my IP address is? The answer to the latter is quite simple - visit
whatismyip.com or any number of other sites that provide this information. In fact you can now just search
'what is my IP' on Google and get your IP address right in a search results page.
Once you've entered your IP address, you want to choose which "Views" (Sites) you'd like to apply the new filter to. Click save and you're done!
From here on out, you'll no longer be polluting your website traffic data with your own visits.