It's hard believe that it was over two years ago that I wrote this GA goal setup walk-through, but the date doesn't lie. A lot has changed in that time - removal of the old version of GA, navigation overhauls, more navigation overhauls - so it seems like an update is overdue. While the process for setting up basic destination goals is largely the same as it was in 2012, it's different enough visually to render the old screenshots completely obsolete. So let's diver right in. (Don't be intimidated by the length of this post, setup should take you no more than 5 minutes in most cases)
Google Analytics Admin > Goals
At some point I'd still like to dedicate a blog post to exploring the new GA admin interface, but for today let's just stick with where you locate the goal section. Start by clicking on "Admin" in the top navigation. You'll be brought to a page that looks like this: 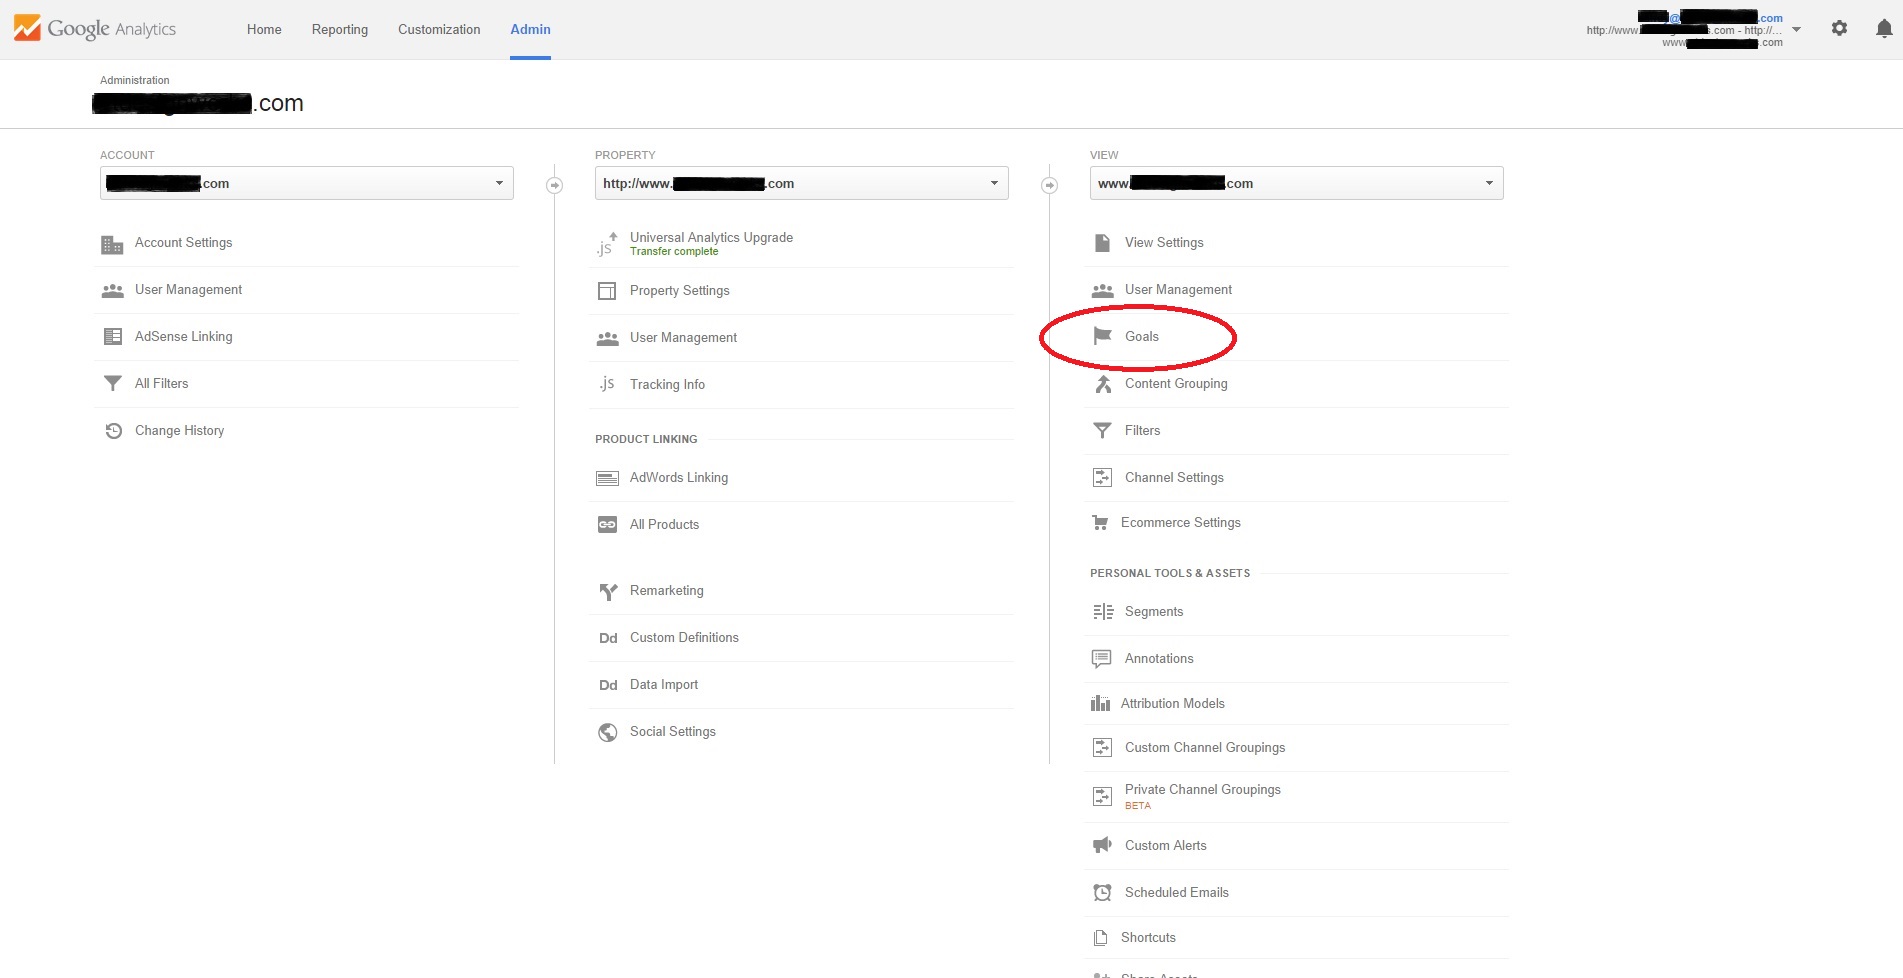 (Click to Enlarge) As you might have guessed, you'll next need to click on "Goals". On the next screen, you'll see a list of your existing goals and a big red "+ NEW GOAL" button. Click the button to get started, and you'll see a screen with options similar to this:
 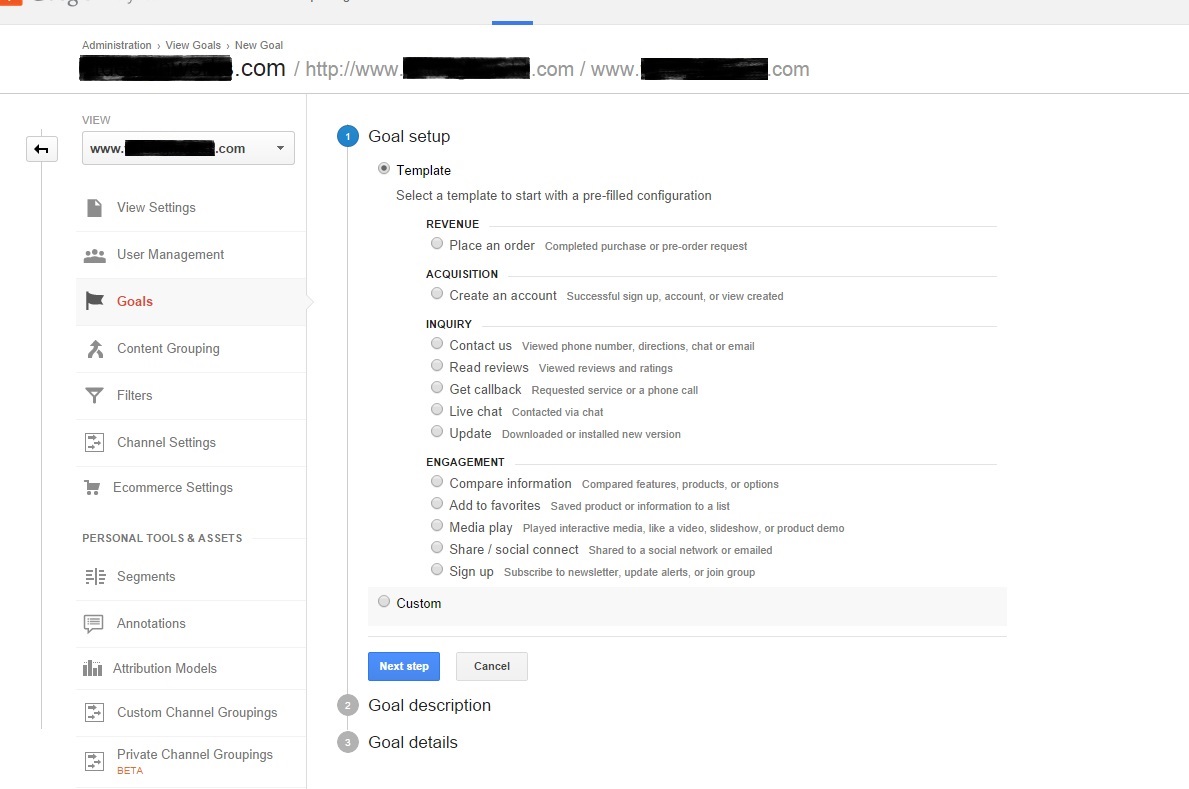 Click to Enlarge I say you'll see a screen similar to this, because the options will vary depending on the industry category you chose when you set up your web property. (If you didn't choose a category at all, you won't even see the parent "Template" radio button, or any of its child radio button options - We'll discuss this further another time.)
Google Analytics Goal Templates vs. Custom
The "template" options are the biggest change in goal setup, but they're basically "goal setup for dummies". As I mentioned, the suggested templates are based on the industry category you chose for your web property. Selecting a template is optional, but if you choose to select one, Google Analytics will auto-select from one of the 4 "goal types" which are unchanged since at least 2012:
- Destination
- Duration
- Pages/Screens per session
- Event
Alternatively, if you choose "Custom", rather than "Template" and just choose which of the 4 types you'd like. In fact, even if you choose a template, you can change the type from whichever GA auto-selects for you. Again, the new "template" option exists mainly to help guide newbies through setup.
Google Analytics Goal Types
If you're a beginner, a template will probably be a useful starting point, but there's no guarantee there'll be one that matches the visitor behavior you're seeking to track. So, in order to better understand what each type of goal is used for before you proceed, here are Google's definitions:
Type Description Example Destination* A specific location loads Thank you for registering! web page or app screen Duration Sessions that lasts a specific amount of time or longer 10 minutes or longer spent on a support site Pages/Screens per session A user views a specific number of pages or screens 5 pages or screens have been loaded Event An action defined as an Event is triggered Social recommendation, video play, ad click
Pretty straightforward, no? To keep it simple (and keep this post as short as possible) we'll now set up a simple "Destination" goal as it's one of the most common and easiest to set up. Duration and Pages/Screens are pretty basic too, but see this post for a crash course on Event goal setup.
GA Destination Goal Setup
Whether you selected template or custom, once "Destination" is chosen, you'll have to name your goal and then click "Next step". At this point, you'll be presented with the following fields (I've expanded those that are optional in the screenshot for the purposes of this post):  Click to Enlarge The only required field, and obviously the most important, is the Destination URL. The short explanation of what you put in this field is the URL that only those who complete the tracked action will see (e.g. a "thank you" page for some sort of checkout process or form completion). The key is to only include everything after the ".com". For the purposes of this post, let's pretend our goal is the completion of a "Quote Form". Basically a lead capture contact form that delivers personal info to the webmaster who can then contact the user later with a quote. So, if the thank you page URL is http://www.yourdomain.com/free-quote/thank-you, we use /free-quote/thank-you as the goal URL. You can read about more examples of "Destination" goals here.
Goal Destination URL Match Types
Note: Choosing a destination URL may be slightly more complex if your URLs are dynamic in any way. If this is the case you'll need to change the drop-down option from "Equals to" to either "Begins with" or "Regular Expression". Read more about how to use these options here.
Goal Value (Optional)
If you can attribute a monetary value to a visitor hitting your destination URL, such as a product purchase, then you can fill out this field to help you get a better idea of your ROI. Obviously if the value can vary, you'd want to find a way to separate goal completion paths and use multiple goals to properly attribute values to each, or otherwise turn this option off. In our example of a quote form, it's too early to know the value of the visitor who filled out the form, so we would turn this option off as well.
Goal Funnel (Optional)
Like value, the funnel fields are optional, but in many cases should be used. In our example, our goal destination URL is the thank you page someone hits after filling out a form, so the "funnel" that took them to that page includes the URL of the form itself. If you use a multi-step form, then you'd want to include all form URLs in the funnel steps. Additionally, if you're strictly looking for data on conversions based on a specific landing page, you could include that in your funnel setup. So, going back to our example, where the goal destination URL is http://www.yourdomain.com/free-quote/thank-you, our funnel step would like be http://www.yourdomain.com/free-quote/, so we'd use /free-quote/ as Step 1 (the only step in this basic example). Funnels allow you to see your form's "abandonment rate", which is key to identifying where you lose users during the conversion process. Is your form too long? Are required fields unclear? The abandonment rate can help you figure these and other issues out, but you have to create a funnel.
Complete Setup
Click the "Create Goal" button and you're done! I recognize that brevity isn't my specialty, but as always, I assure you that Google Analytics goal setup is quite quick and easy.
GA Goal Reporting - Conversions>Goals
Once your goals are set up, data will begin to flow to your reports. You can even set up custom reports with goal data, but to just get a snapshot of your goals, flip over to your "Reporting" tab, expand the "Conversions" section, expand the "Goals" section and choose "Overview". Keep in mind that goals don't work retroactively, so you won't see any data immediately after setup, but any goals that are completed going forward will be tracked.